Adding an Extension to GameMaker
In this article, we will explain how to add the SpellSync extension to GameMaker.
The latest version of the extension is available at this link.
The extension requires IDE 2023.2.0.71, Runtime 2023.2.0.87 or higher.
Adding your game to the control panel
Before starting the installation of the SpellSync extension in your GameMaker project:
- Add your game to the control panel.
- Click the
Add gamebutton. - In the new window, give your game a name and click the
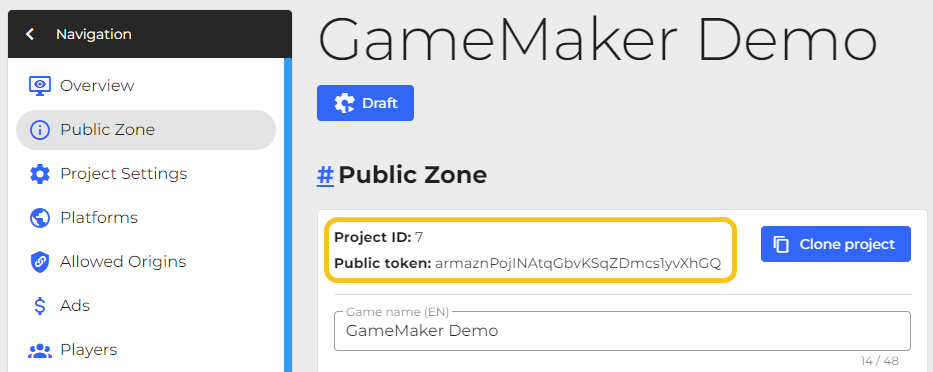
Add gamebutton. After that, you will enter the project interface. To add the project to GameMaker, you will need theProject IDandPublic Key.
Adding the extension to GameMaker
Download the latest version of the extension.
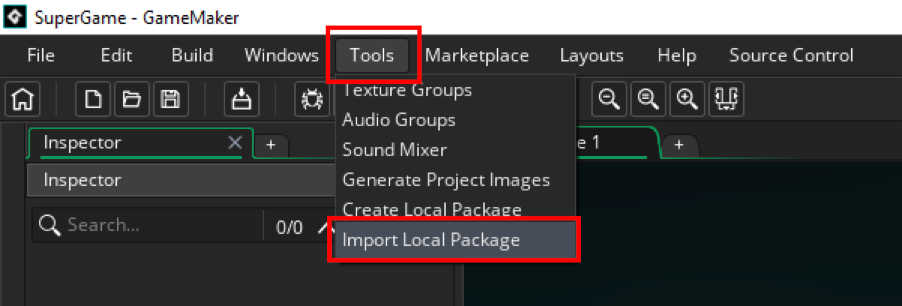
Import the plugin through the import of local packages.

- Select all resources for import.
Configuring the extension in GameMaker
- In the SpellSync control panel, copy the Project ID and Public Token.

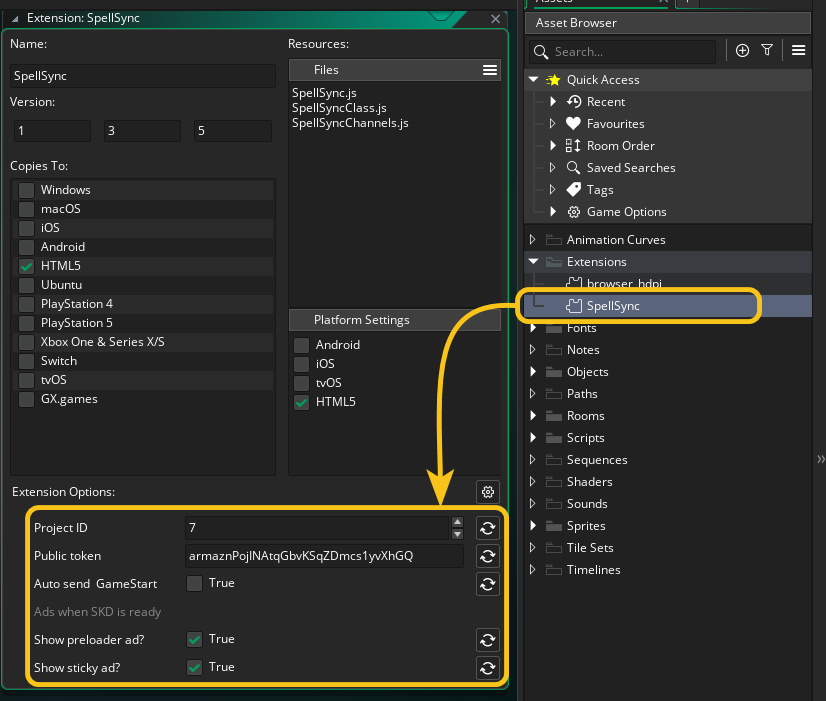
- Open the SpellSync extension settings in GameMaker and paste the Project ID and Public token into the corresponding fields.

- If you want to display ads immediately upon opening the game, enable the checkboxes for Show preloader ad? (Fullscreen ad) and Show sticky ad? (Banner).
Example of displaying rewarded ads
- Call the function to display ads. You can specify any tag.

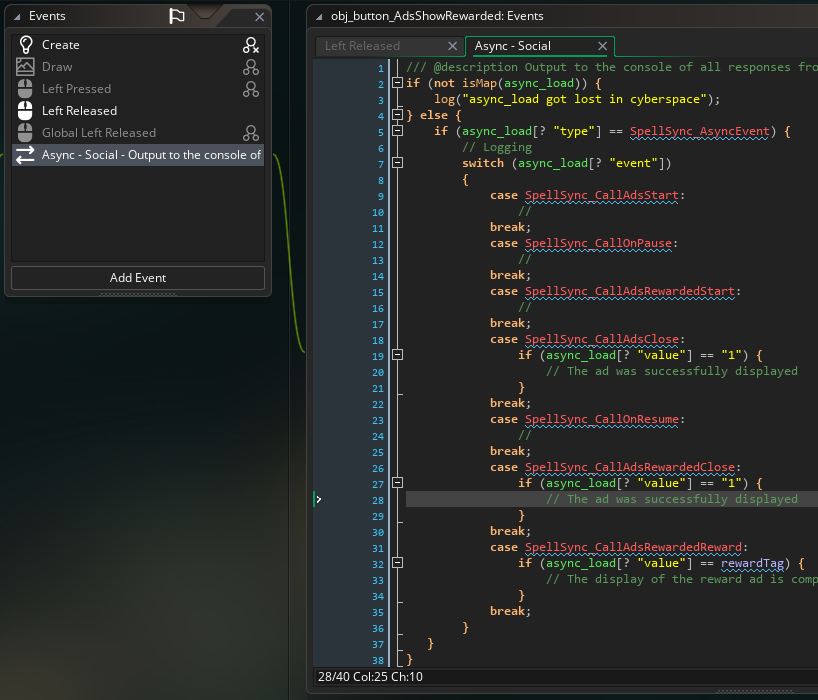
- The viewing result will arrive in the asynchronous Social event. The event type will be SpellSync.
The SpellSync_CallAdsRewardedStart event indicates the start of the ad display.
The SpellSync_CallAdsRewardedClose event indicates the end of the ad display.
The SpellSync_CallAdsRewardedReward event indicates the successful completion of the rewarded ad. The player's reward must be granted.

Useful information
Repository link: https://gitlab.com/spellsync/game-maker-spell-sync-extension
Author: Trumdu
Stay in Touch
Other documents of this chapter available Here. To get started, welcome to the Tutorials chapter.
SpellSync Community Telegram: @spellsync.
For your suggestions e-mail: [email protected]
We Wish you Success!